The Discounts Tab
Welcome to the Coupons Tab! Here, you can create and manage coupons/discounts for your event. We provide you with a number of options that allow you complete control when creating coupons. Let walk through the process and explain each of your options. To get start, click on 'Create Discount' on the upper right.

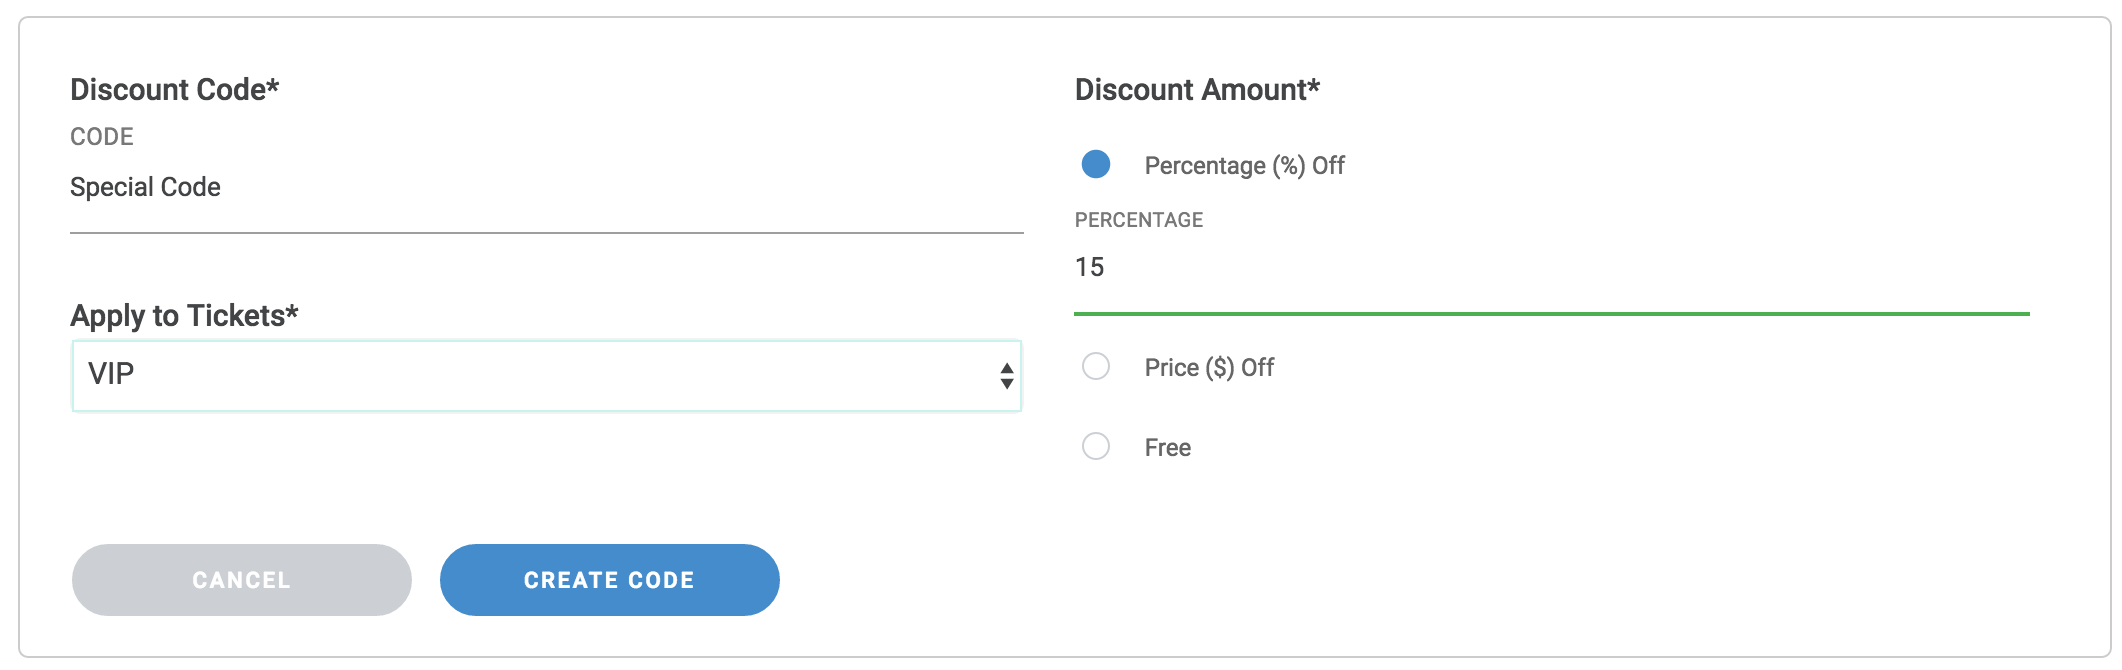
Once you do this, you will be on step 1 of the coupon creation process. Here, all options are required. You will need to choose a code, select the discount amount and choose which ticket the coupon applies to.
Choose a code: To choose a code, enter text into the 'CODE' field. We recommend entering one word, all lower case that is simple and easy to remember. For this example, we used 'specialcode'. This wil be the code you attendees type in when they are getting a ticket.

Apply to Tickets: This drop down will allow you to make a choice. Either you can have the coupon you are creating be applied to ALL tickets, or you can have the coupon apply to ONE ticket of your choosing.
Discount Amount: Here, you will choose one of three options:
- Percentage (%) Off means that a percentage will be taken off the base price of a ticket. If you create a 15% coupon and it is used on a $100 ticket, 15% (in this case $15) will be removed and the ticket will cost $85 + applicable fees.
- Price ($) Off means that a set amount of dollars will be taken off the base price of a ticket. If you create a $15 coupon and it is used on a $50 ticket, $15 will be removed and the ticket will cost $35 + applicable fees.
- Free means that the the entire cost of a ticket will be taken off the base price and the final cost will be $0, or free, no matter what.
Once you have completed the above-mentioned three areas, you will be ready for step 2. Click 'Create Code' and more options will open up for you to work with.
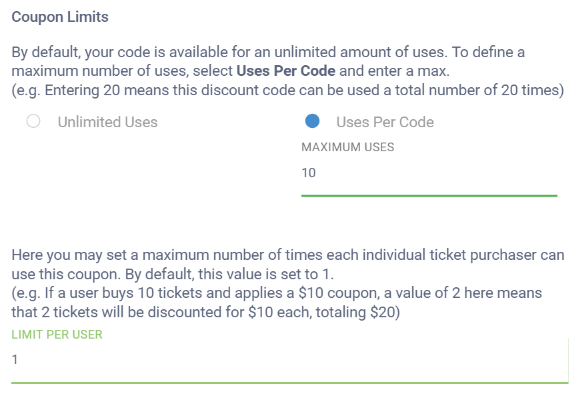
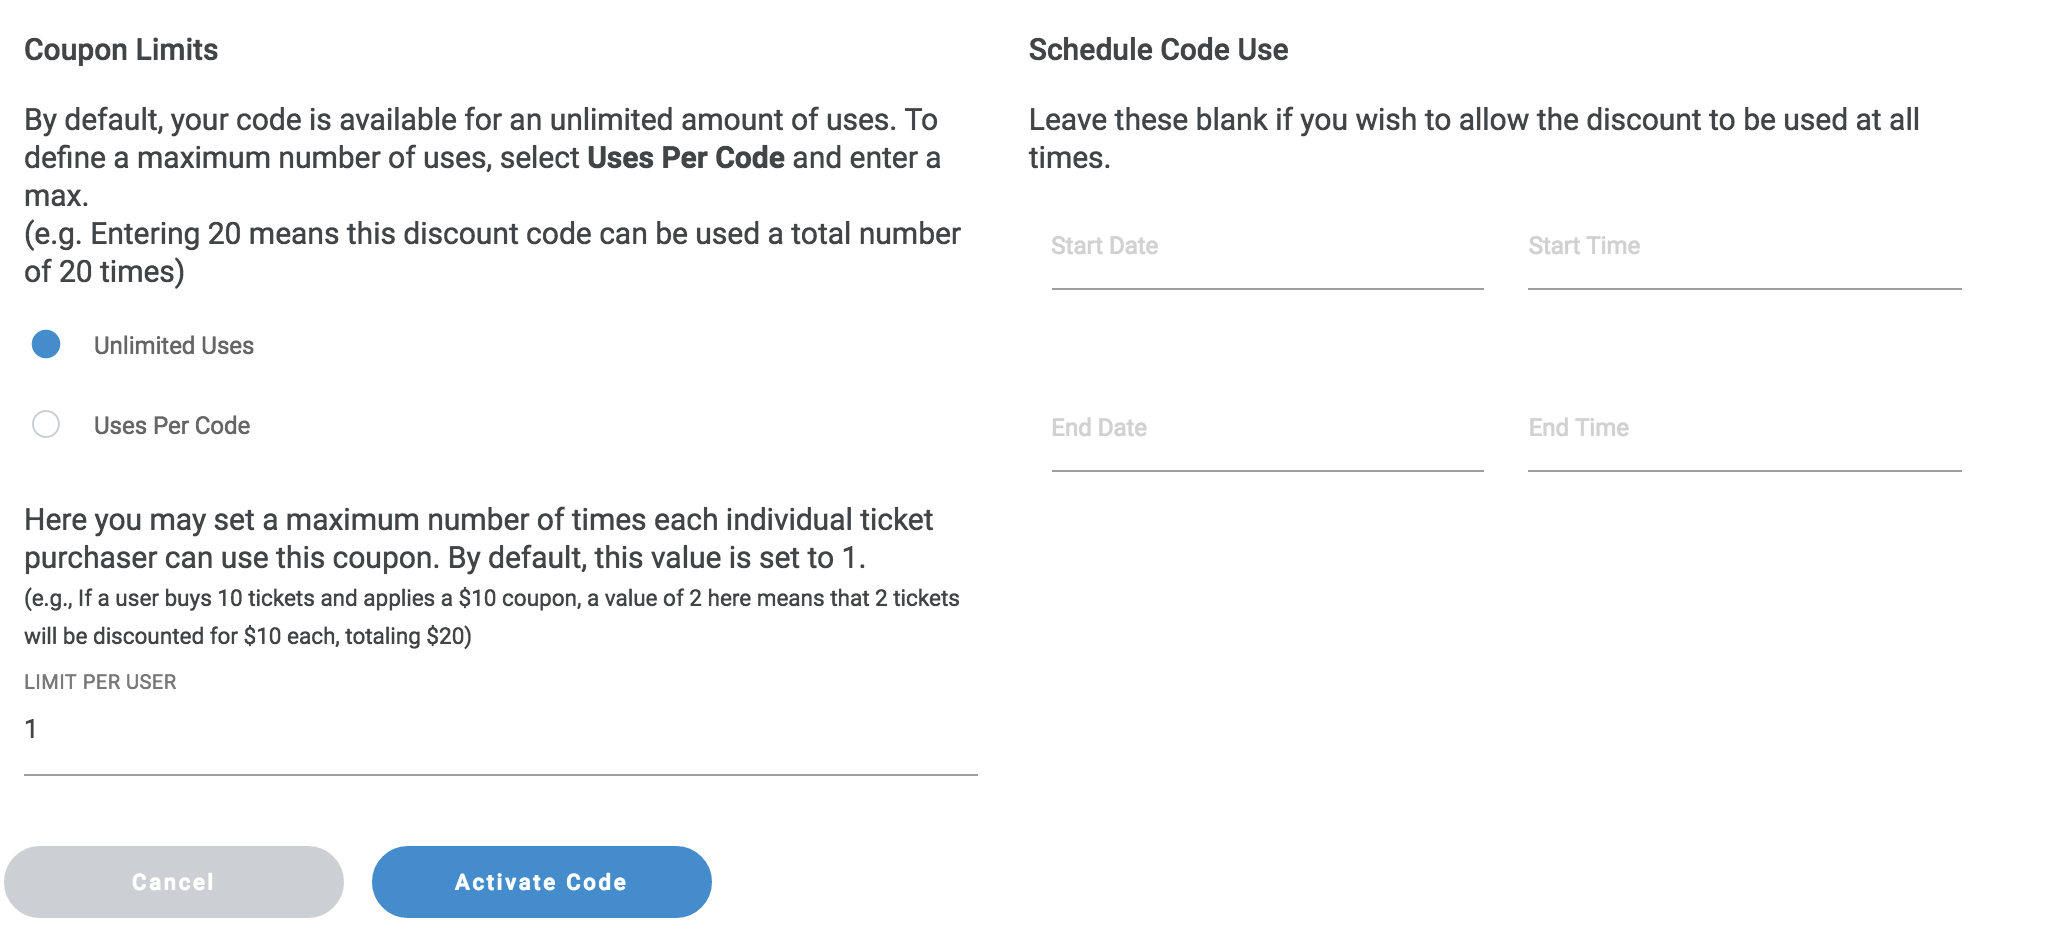
Step 2 has three more optional choices you can make that will give you total control of your coupon. First off, there are two ways to control coupon limits:
Under coupon limits, you can choose between 'Unlimited Uses' and 'Uses per Code'. By choosing 'Unlimited Uses' you are choosing to place no limit on the number of times this coupon code can be used. By choosing 'Uses per Code' you are saying that you only want this coupon to be used a certain amount of times overall. In the screenshot below, we have entered 10, which means once the 'specialcode' coupon we created above is applied to 10 tickets, it will no longer be usable.

Under coupon limits, you are also able to select a 'Limit Per User'. This gives you a second level of control by limiting how many times a coupon can be used during a single order. We set a default of one (1) which means that no matter what you have selected for 'Uses per Code', the code can only be used once per order.
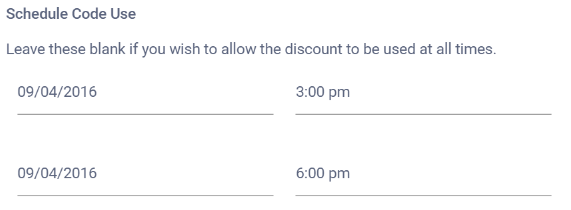
Finally, you are able to schedule a time frame during which the coupon can be used. You can leave the scheduling option blank if you want the coupon to be available at all times or you can choose dates. In the example below, we chose a short window for the coupon to be available, a few hours, that we could promote as a flash sale or special promotion.
Now that we have completed the process of setting up our coupon, we can save it by clicking on 'Save Changes'. You see the other options here such as 'Cancel' and 'Deactivate Coupon' because you will come back to this same screen if you ever need to edit or change the status of your coupon.
Once you have saved your coupon, you will see it appear in your coupons table. You can see whether or not the coupon is active, what type of discount you selected, how many times the coupon has been used and the total amount of saving you have passed on to your attendees. You can also go back into the edit screen by clicking the small blue pencil, or delete the coupon all together by clicking on the trash can icon.